USER MANUAL

Contents
Overlay · User ManualIntroduction
WelcomeAbout Process.audio
Making records used to be about the music. In the recent past, with the advent of the digital workflow, making records has increasingly become an exercise in minutia as well as a plugin arms race, creating a steep learning curve and shifting focus to the tools at the expense of the music. PROCESS.AUDIO was founded by a team of world-class music-making professionals, led by Fab Dupont, to create music-making tools that strike the perfect balance between analog workflow and digital technology only enhancing their owner's process.
About Overlay
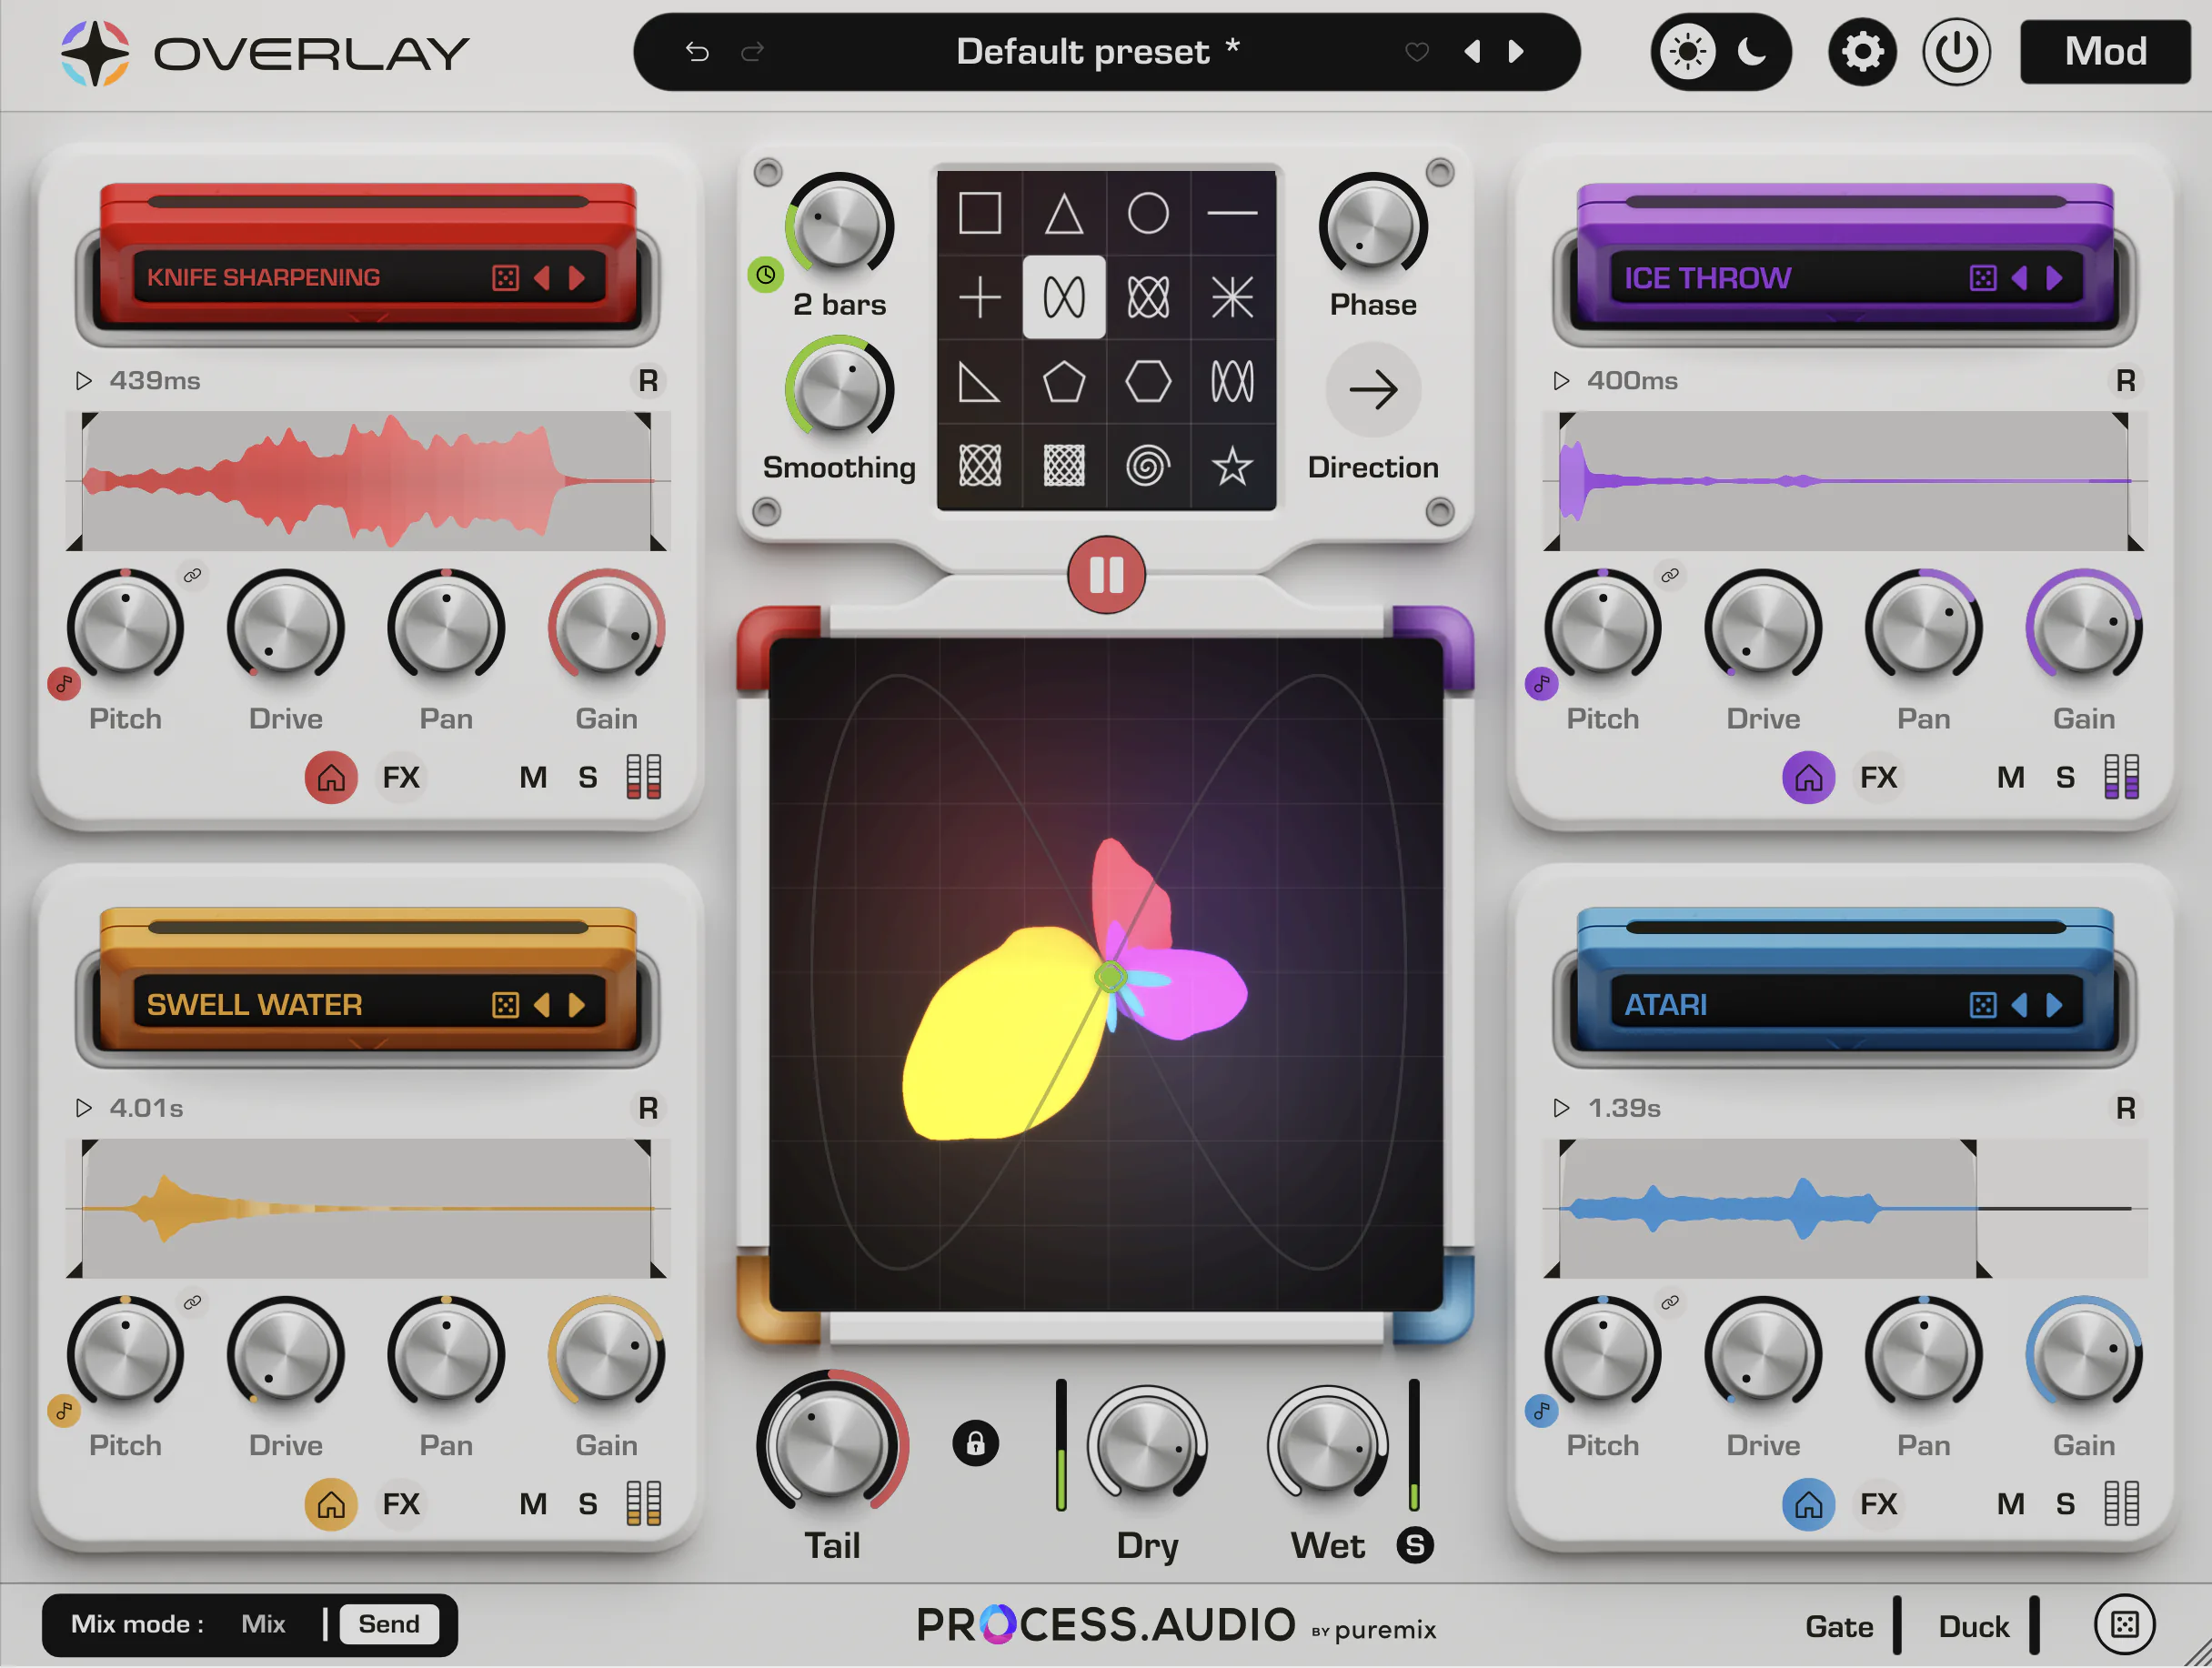
Overlay is a creative multi‑effect built around convolution. Rather than treating an impulse response as a static reverb, Overlay turns it into raw material: load up to four independent layers, each with its own impulse, and run every layer through a full effects chain — pre‑delay, drive, EQ, modulation, echo and stereo shaping.
The four layers are blended on an XY pad, so you can morph between completely different textures with a single gesture — or hand that gesture to a modulator and let it move on its own. Almost any control can be modulated by any of the ten modulator slots, making Overlay as much a sound‑design environment as an effect.
Four convolution layers
Each layer loads its own impulse response and runs an independent effects chain, from pre‑delay through to stereo width.
XY morphing
Blend the four layers on the XY pad in Mix or Send mode, manually or driven by an animated shape.
Deep modulation
Ten modulator slots — LFO, Envelope, Random or Sequencer — can be assigned to nearly any parameter.
Built‑in dynamics
A tempo‑syncable Gate / Duck module adds rhythmic movement and side‑chain‑style pumping.
Overlay includes a built‑in hints panel. Hover any control and a short description appears at the bottom of the window. Toggle it from the header, and close it with the cross on its left edge. This manual expands on every one of those hints.
Installation & Requirements
Getting startedRun the installer for your platform and authorize the plugin with your Process.audio account. Overlay installs the formats your host needs into their standard locations.
Plugin formats
- VST3 — Windows and macOS hosts
- Audio Unit (AU) — macOS hosts such as Logic Pro and GarageBand
- AAX — Pro Tools (native)
Channel configuration
Overlay is a stereo effect: up to two input and two output channels, with no MIDI processing. Insert it on any mono‑to‑stereo or stereo channel, bus or send.
First steps
- Insert Overlay on a track and open the editor.
- Browse the presets from the header to hear what the engine can do.
- Click a layer's cartridge to open the browser and load an impulse response.
- Drag on the XY pad to blend the active layers.
The window is freely resizable and remembers its size. Switch between dark and light interface themes from the header at any time.
Interface Overview
OrientationThe interface is organized into four regions: the header across the top, the main section with the XY pad and output controls, the layer panels that surround it, and the optional modulation panel on the right.
Header
Global controls — bypass, preset browser, settings, theme switch and the modulation‑panel toggle.
Main & XY Pad
The central quad blends the four layers. Around it sit the dry/wet, follow and randomize controls.
Layer panels
One panel per layer, each with its impulse cartridge and the Home / FX tabs of controls.
Modulation panel
Ten modulator slots and the assignment view, shown or hidden from the header.
Signal flow
The input first passes through the Gate, then feeds the four layers. Each layer processes audio through the chain below. The layers are blended (manually or via the XY pad), passed through the Duck and the dry/wet mix, and sent to the output.
Global path
Per‑layer chain (×4)
Header & Global Controls
Top barThe header holds the controls that affect the whole plugin and your workflow around it.
Output Section
Mix & balanceThe output controls set how much processed signal you hear and how it sits against the dry input. The dry/wet balance can be locked so it survives preset changes.
The Quad — XY Pad
Layer blendingThe XY pad is the heart of Overlay. It blends the four layers according to the position of the dot — drag it by hand, automate it from your host, or hand it to an animated shape that moves on its own.
Mix vs. Send mode
Mix
The XY pad acts as a volume balance between the four layers' outputs — moving the dot crossfades between them.
Send
The XY pad acts as multiple sends into the four layers, letting the dot drive how much signal feeds each layer.
XY Pad animation
Instead of moving the dot by hand, Overlay can trace a geometric shape across the pad automatically, turning the blend into a continuously evolving motion.
Shapes include Square, Triangle, Circle, Line, Cross, several Lissajous ratios (1:2, 2:3, 1:3, 3:4, 5:6), Pentagon, Hexagon, Spiral and Star.
Working with Layers
Cartridges & impulsesEach of the four layers loads an impulse response into its cartridge. The cartridge is both the loader and the layer's identity — selecting it makes that layer active for editing.
Layer 1
Top‑left corner
Layer 2
Top‑right corner
Layer 3
Bottom‑left corner
Layer 4
Bottom‑right corner
Loading your own files
Drag an audio file from your desktop anywhere onto a layer panel to load it as that layer's impulse.
Right‑click a cartridge to copy or paste an entire layer — impulse and all its settings. Drag one cartridge onto another to swap the two layers, or hold Alt while dropping to copy one layer onto another.
The impulse library
Impulses are organized hierarchically by bank, category and tags, and can be filtered and sorted in the browser. Factory impulses are read‑only; impulses you create or import can be edited and tagged. You can also build new impulses from any audio file.
The Layer Signal Chain
Per‑layer modulesEvery layer carries a full effects chain. The Home tab holds the impulse, pitch and tone essentials; the FX tab holds the EQ, pre‑delay and echo.
Impulse & Waveform
Pre‑Delay
Drive
EQ
Echo
Stereo & Utility
Dynamics — Gate & Duck
MovementOverlay's dynamics work at two points in the signal path. The Gate acts on the input before the layers, chopping the source so each layer is fed a gated signal. The Duck acts on the blended output after the layers, pulling the level down for side‑chain‑style pumping. Each can be set to a normal or inverted shape, or turned off.
Modulation System
Bring it to lifeOverlay's modulation system is global and generous: ten modulator slots can be assigned to almost any parameter, and any parameter can be driven by more than one modulator. Each slot can be an LFO, Envelope follower, Random generator or Sequencer.
Assigning modulation
- Open the modulation panel from the header.
- Drag a modulator onto a control, or use the control's modulation overlay, to create an assignment.
- Set the amount (depth) and polarity (one‑sided or bipolar) for each assignment.
- Routing is drawn as cables, so you can always see what is moving what.
LFO
Envelope
Random
Sequencer
Assign a modulator to Balance X and Balance Y — or use the built‑in XY animation — to keep the layer blend in constant motion without touching the mouse.
Presets & Settings
Manage your soundsOverlay ships with a library of factory presets covering everything from subtle ambience to radical sound design. Use them as finished sounds or as starting points.
- Browse the preset library from the header, and step through presets with the arrows.
- Save your own presets to recall complete states, including all four layers and every modulation routing.
- Lock the dry/wet balance so your blend stays consistent as you audition presets.
- Randomize to generate new variations across all layers.
The settings menu in the header offers additional options and information about your installation, including the toggle for the interactive help panel described throughout this manual.